Showing posts with label Crafts. Show all posts

Friday, January 18, 2013

Sand Art!

This was something fun we did at Megan's birthday party! All the kids loved it and it was so easy to put together (and cheap!). First I cleaned out some baby food jars for each kid that was coming. These were the perfect size for them. Then I took salt and rubbed chalk on it until I got the color I wanted! I first tried rubbing the salt on wax paper which worked will but got a few holes...wasn't bad. Just make sure you do a little at a time, that way you get the maximum color.


Then with a little adult help the kids filled their jars with the different colors! I did pull out the funals but we ended up not using them. The kids just used spoons to scoop each color in.


Thursday, January 17, 2013

A Few Cards!

I always love finding cute cards online, espcially ones that look easy and are cute! So, I always make sure to share the ones I get and ones I make with you :)


Friday, January 11, 2013

Halloween Decor!

 So I had fun with the Halloween decor this year. As some of you know my husband LOVES Halloween, so my way of getting into it is making cute decor for the house!
Here's our window...it looked AWESOME at night. We had orange lights going around the window and a strobe light hitting it! I made the tree and pumpkins and everything else out of black trash bags!! (Awesome idea from my mother!). I sat downstairs one night and laid it out on the floor, then I just started cutting. I really free handed everything and I'm so not the artiest, trust me on that! I loved how it came out!

Here's Frankenstein! I made him just out of materials I had on hand. I had some black fleece (which made it a little harder to hang but not impossible) and sheets for the white. I free handed this one as well but I followed this picture just to give me an idea of what I was doing! My girls loved Frankenstein. My husband told the girls he was protecting our home while we are away. I even had a neighbor tell me her girls would giggle at him as they would drive by:)
 

 And I just had to add this picture in (sorry for the blur and corny me). This was me for Halloween. My good friend, who we were going trick or treating with, wanted me to dress up with her (this was the night before Halloween). So all night I searched online for a last minute idea that I could throw on for her. So here you go...a great last minute idea!

Wednesday, October 10, 2012

Baby Diaper Wreath!

This cute diaper wreath was so fun to put together. I just took the foam you can buy at the hardware store in the toilet section (only $.97 for one which makes two wreaths, it's called pipe insulation). Made it round and duck taped it together like what I did for the 4th of July wreath I made. Then take diapers, open them up and place around the tub. Tie with a cute string or ribbon to hold it on. Continue around the tub until the whole tub is covered by the diapers. Then start adding on the different things you'd like. I did some rubber ducks, baby lotion, baby shampoo, a few hair bows and an initial for her name. We hung in on the door for everyone to see when they walked in.

These are great cause they're cute and everything on it is useable! They are always a big hit at any baby shower!

Friday, October 5, 2012

Father's Gift

These were what I made for Father's Day and I just found the picture. I'm sorry it's forever ago but I thought it could be a great idea for even a birthday for a Father or next Father's Day!


All I did was make a fan fold (or whatever you want to call it) and place the sign World's best Pop on top. The fan folds are super easy to make. Just take a sheet of paper and cut it to the length you'd like it to be. Then, you can score each fold (mine were about 3/4 - 1" apart) or just guess and fold like I did cause I don't have a scorer. After that you'll tape the two ends together to make it round. It's easy to do just hard to explain in writing. (Here's a great tutorial with a video at the end if that would help you!)

Thursday, October 4, 2012

Tissue Paper Pom Poms

 
I sure many of you have seen the tissue paper pom poms but I want to tell you just how easy they are to make and what an impact they have at a party! These were a few I made for my sister in laws baby shower at my mother in laws house! They were supper easy to make and we just hung them with tacks and fishing line.


To make the pom poms I followed this tutorial! She gives great detail on how to make them. I used more tissue paper to make mine fuller (about 10-12 sheets) and I didn't cut mine down. She also includes this awesome picture to show you how when you cut the ends it turns it into a different flower!


Wednesday, October 3, 2012

Cheese Cake Bites and RS Mad Hatter Birthday Party!

For our Relief Society activity we put together the Mad Hatter Theme. We had classes relating to the different hats we all wear and how to improve things in our life (Cleaning, Time Management, and Scripture Study). After classes we had lunch for them where we made chicken pockets and these amazingly easy cheese cake bites! These were so easy I made them again for a family activity! Here's all it entails,

Ingredients:
2 pkg (8oz each) Cream Cheese, softened
1/2 cup sugar
1/2 tsp vanilla
2 eggs
12 Nilla Wafers
1 can cherry pie filling (or any pie filling)
12 cupcake wrappers

Heat oven to 350 degrees. Beat cream cheese, sugar and vanilla with mixer on medium speed until well blended. Add eggs; beat just until blended. Place cupcake wrappers in cupcake/muffin pan. Place 1 wafer on bottom of each of the cupcake wrappers. Spoon cream cheese mixture evenly over wafers. Bake 20 minutes or until centers are almost set. Cool. Refrigerate for at least 2 hours. Top with pie filling just before serving. Keep refrigerated.

Also, check out those cute water bottles...it's done with duck tape! They were so freaking easy to do! I didn't even remove the label, I just placed the tape over top of them! They come in such cute colors that it could really go with anything!

To check out the rest of the decorations for the Mad Hatter Birthday Activity you can go here!


Friday, September 28, 2012

Just Because/Thinking of You Gift


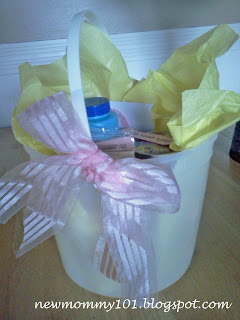
So this idea was totally thrown together with things I had around the house. It's a little corny but I thought it was still cute:)   

Here's what in the basket...

I'd go "nuts" without you
You make me want to "shout"
You have such a big "heart"
You are so "bubble" -ly
You are a "souper" friends, mother and daughter of God
I always have a "popping" good time with you

Wednesday, September 26, 2012

Organizing My Fabric


So I saw this AWESOME idea on Pinterest and had to give it a shot. I had all my fabric just thrown into a big box and it was always so hard to see what I had. I loved this idea and the organization of it.

All you need is hanging folders to hang your fabric on. I just folded the fabric however it would fit onto the file folder. Each fabric was a different cut so they were all different folds. I also cute the folders in half so that I had two, if you have a heavy piece of fabric you could just use one folder for extra support. We don't have much room in our house so mine are in a box that is made for hanging folders (found at Staples or Office Depot). I Love It! It's so much easier to see everything, they stay nice and pressed and take up less room!

Monday, September 24, 2012

Cards Cards Cards

Here are a few more samples of cards I have done and others have done from my card group!


Thursday, July 12, 2012

T-shirt Headbands


Just when I thought I knew everything there was to make out of an old t-shirt I ran into this tutorial on making -shirt headbands for my girls! They so super soft and my littlest "pull-everything-out-of-my-hair" girl left them in longer then normal!! And the best part, they're NO SEW headbands! I've been in a no saw mood so this was great!

I didn't follow the tutorial exactly and they still work great. Instead of using the sticky adhesive I just pulled out my hot glue gun!! Just cut a strip of t-shirt long enough to go around your childs head (or your could make it for yourself!). Hot glue the two ends together. Cut a smaller piece to cover the part you just glued together! Easy peasy!! (the tutorial has great step by step pictures if you need it!)

On the green one, I took a bleach pen to it to make the poka dots! Just put your design in and let it sit for about 30 minute (100% cotton works best!), wash off and let air dry.

Saturday, June 30, 2012

Something Extra - Thank You

This is a simple yet cute idea to use as a thank you or even thinking of you gift. I just typed up the saying, printed it and glued it to some cute paper!


Wednesday, June 27, 2012

Homemade Birthday Cards


These were about the easiest cards I've made!! I found this cute download from The Crafting Chicks  and then just cut them out and glued them onto cute paper, added a few do dads and wa la ( I got the blue jewels from Hobby Lobby)!! The print out is not only perfect for cards but you could easily use them just as a tag or even a cute cupcake topper!!

Here's the link directly to the download!


Wednesday, June 20, 2012

4th of July is almost here!

I seriously love the 4th of July but I found I didn't have a lot of decor for it. So that needed to change!! Check this out!

I am in love with the way it came out!! It was a lot of work but cost was very little. I paid 97 cents for the foam wreath found at the hardware store in the plumbing section (it's a straight foam tub that you cut to the size of wreath you want and duck tape the two ends together)! Amazing compared to the $8.00 it was going to cost at the craft store. I ended up using red fleece because that's what I had on hand and it worked great! I bought straight pins at the dollar store (honk's), there was 800 in one package! The blue ribbon is from Hobby Lobby in the wedding section...I loved the color and they were on sale for 50% off!!! (YA for sales!!) For the star cut outs I found one online just using google and printed to the size I wanted my stars to be, trace and cut, just that easy!

Here's where the idea came from. She used felt instead of fleece and she was also able to find a foam wreath at the dollar store which I looked at couldn't find.

linked to:

Tip Junkie handmade projects
 

Wednesday, May 23, 2012

My New Lamp Shade!!


I'm so excited with how this came out!! I love it! I must say though I wasn't liking it when I first started, it just didn't seem cute or right or anything like that! That was when I only had one on, after a few more it really started to grow on me and now I love it!!

This is a time consuming project but it was worth it to me! Thanks to Mama says sew for the great tutorial! She gives great step by step instructions! This project cost me a totally of $2!!! (plus the stand that I got at Ikea awhile ago for maybe around 5 dollars).

Here's the wonderful before lamp shade I picked up at the DI for 2 dollars! Not so pretty but works great!

I put my roses farther apart and then went back and filled in the wholes with smaller roses.


And the finally product!

Wednesday, May 9, 2012

Binky clips for Soothies!


Would work for other binkies as well!


I am so in love with the new binky clips I made. As some of you might know it's hard to find binky clips that work for the soothie kind, well that's all my kids take so I needed to come up with something that would work...and here they are!

These are easy to pull together in just a few minutes (a great nap time craft to work on!), I cheated and bought the ribbon like that but there are tutorials out there on how to make your own, I used about 1/4 yard. I sewed a loop on one end (I just ribbon cause that's what I had on hand, I think elastic would work great here cause then you don't have to worry about the size of loop). Keep in mind that your loop needs to be big enough to fit the binky through it as well as the ribbon. At the other end I hot glued a clip on that I got at Hobby Lobby (or any craft store would work!). That's it!!! You'll just put your loop through one of the holes and pull the ribbon through it!

To me this is pretty basic but if you'd like pictures to go along with it let me know, I'd be happy to whip up another one:) You can never have too many!!


Link ups:

 OurDIYDiaries

Thursday, April 26, 2012

Slip Cover for the Boppy!


I was so excited when I found my boppy for a really good price, the only thing was it didn't have a slip cover to protect it. So easy enough I whipped one up this morning! It was quite easy, my only complaint is the zipper, they aren't my favorite but it worked out great! I had to call my mommy to have her explain how to do a zipper...I liked her explanation better. You first stitch with a large stitch (about a 4) the two pieces together (where the zipper goes). Then pin your zipper in place with the right side facing out. Stitch around the zipper, back stitching on the ends to reinforce the stitch. Then you'll unpick the front where the zipper is so that it's now visible. Hope that makes since...if not let me know and I'll take some pictures to help clear things up...pictures are always the best!! (I just forgot this time, I was to excited to finish it:) )

Here is the link to:

Boppy slipcover pattern  (click here to see how the pattern looks once put together)
Boppy slipcover sewing instructions


Thanks to Vanilla Joy for finding the link ups!!


Linked up to...


Wednesday, April 4, 2012

Fabric covered peg boards!

When I was doing the challenge of cleaning up our extra bedroom I made these peg boards to go above our computer table. I needed a place I could hang something so I didn't forget about it and saw it every day! These work perfect...here's how I made them.

First cut your fabric so that you have about 1 inch extra around each side.


Then you're going to glue opposite sides down. I just used a hot glue gun cause it seems to work the best. Doing opposites seems to make the corners easier to handle.


 Once you get all the edges glued down you'll have corners that look like this. You're going to open up the corner as much as you can without pulling up the glued part and place a little glue down. Then pull tight to bring the corner to a point and hold until glue dries. I had a little flap after that I just glued down as well.


This is kind of what your corners will look like after you glue them down.


Here is where you can see I hung mine! I love them and they work perfect for what I needed!!

Related Posts Plugin for WordPress, Blogger...